You've written proper alt text. Your filenames read like hammered-silver-ring.jpg instead of IMG_4821.jpg. And still, weeks later, your product photos are nowhere in Google Images. This is one of the most frustrating spots in image SEO, because you did the visible work and got none of the visible reward.
Here's what's usually happening: Google never found the images in the first place. Alt text and filenames only matter for images Google can actually see. Your product photos might load through JavaScript, lazy-load on scroll, or sit on a separate CDN domain. In those cases the crawler can pull your page and come away seeing no images at all. An image sitemap is how you hand Google the list directly.
This guide covers what an image sitemap for SEO is and why online stores hit this problem more than most sites. Then it walks through building, submitting, and verifying one on Shopify, WooCommerce, and custom platforms.
Key Takeaways
- An image sitemap isn't a separate file type — it's your normal XML sitemap with
<image:image>and<image:loc>tags added to each page entry, telling Google which images belong to which URL (Google Search Central).- E-commerce needs it because product images are often invisible to the crawler: hidden behind JavaScript galleries, lazy-loaded, or served from a CDN on a different domain.
- Google deprecated
<image:caption>,<image:title>, and two other tags in August 2022 — only<image:loc>still works (Google spring-cleaning blog).
What Is an Image Sitemap?
An image sitemap is a set of XML tags that lists the images on each page of your site. It lets Google discover and index images it might otherwise miss. It's an extension of the standard sitemap protocol, not a separate document. You add image tags to the same <url> entries you already have, or you build a dedicated file just for images.
A regular XML sitemap tells Google about your pages. Each entry is a <loc> with a page URL. Google visits the page, renders it, and finds whatever it finds. If the images don't survive that render, they never get indexed — no matter how good the alt text is.
An image sitemap adds a second layer inside each page entry. Under the page's <loc>, you nest one <image:image> block per image, each containing an <image:loc> with that image's URL. Now Google has an explicit list, independent of what the render produces.
One difference matters for stores. Page URLs in a sitemap must live on your own domain. Image URLs do not. Google explicitly allows <image:loc> values on a different domain, which is exactly what you need when a CDN hosts your product photos. More on that below, because it comes with one condition people miss.
If image indexing is new to you, our complete image SEO guide covers where sitemaps sit in the wider picture, alongside alt text, filenames, and metadata.
Why E-commerce Sites Specifically Need One
Most content sites don't need an image sitemap. Their images sit in plain <img> tags inside article HTML, and Google crawls them without help. E-commerce breaks that pattern in three specific ways, and each one hides images from the crawler.
Product galleries render with JavaScript. Modern storefronts load the main image, then swap in gallery shots, zoom versions, and variant photos through JavaScript after the page loads. Google does render JavaScript, but not always completely or on every crawl. Images that only appear after a script runs are the ones most likely to go missing.
Lazy loading delays the image. Lazy loading is good for speed — it defers off-screen images until the shopper scrolls. But if an image's real URL only appears in a data-src attribute until scroll happens, and the crawler never scrolls, that image can stay invisible. The sitemap lists the real URL regardless.
Images live on a CDN domain. Shopify serves from cdn.shopify.com. Many WooCommerce and custom stores push images to a CDN or object storage on a separate hostname. That's great for performance and no problem for Google — provided the sitemap and Search Console are set up to account for it.
The result is a gap between the images a shopper sees and the images Google indexes. You can have a flawless product page, visually, and a near-empty presence in Google Images. Closing that gap is the entire job of the image sitemap. For the ranking side of the equation once images are indexed, see how to rank on Google Images.
What an Image Sitemap Looks Like
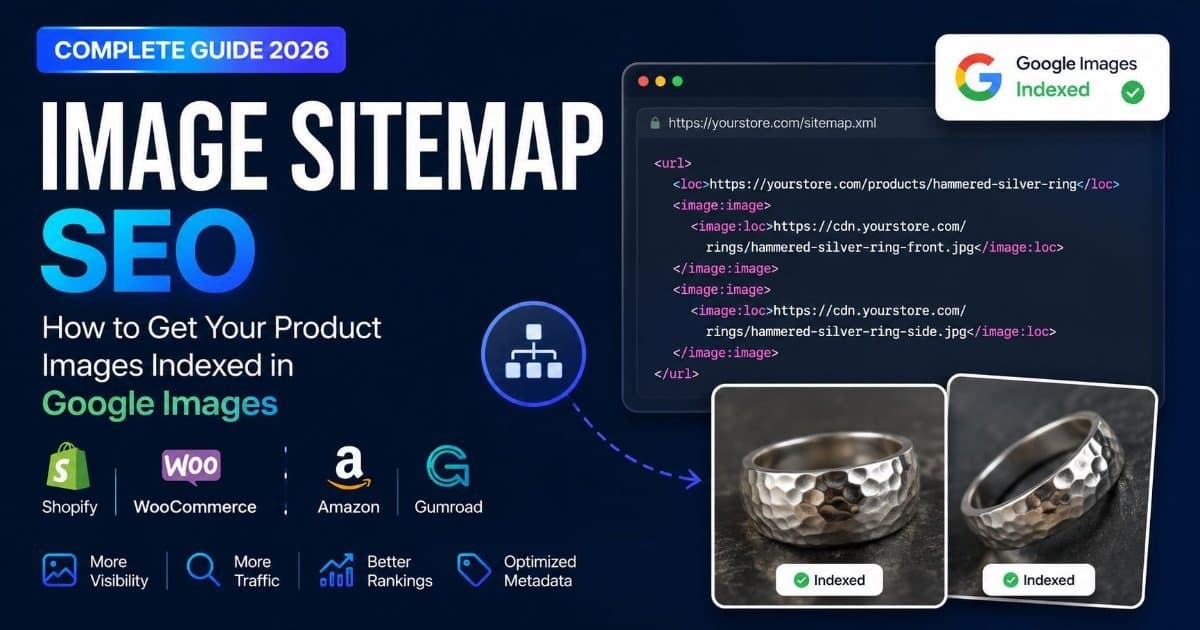
Here's a complete, valid image sitemap for a single product page with two images on a CDN. Every line here does real work, so read it once, then read the annotations.
<?xml version="1.0" encoding="UTF-8"?>
<urlset xmlns="http://www.sitemaps.org/schemas/sitemap/0.9"
        xmlns:image="http://www.google.com/schemas/sitemap-image/1.1">
  <url>
    <loc>https://yourstore.com/products/hammered-silver-ring</loc>
    <image:image>
      <image:loc>https://cdn.yourstore.com/rings/hammered-silver-ring-front.jpg</image:loc>
    </image:image>
    <image:image>
      <image:loc>https://cdn.yourstore.com/rings/hammered-silver-ring-side.jpg</image:loc>
    </image:image>
  </url>
</urlset>
Line by line:
xmlns:image="http://www.google.com/schemas/sitemap-image/1.1"— the image namespace. Without this declaration on the<urlset>, theimage:tags are meaningless and Google ignores them. This is the single most common thing people forget.<loc>— the page the images belong to. This must be your own domain and should be the canonical URL of the product page.<image:image>— one wrapper per image. Repeat it for every image you want indexed on that page.<image:loc>— the actual image URL. Note it points atcdn.yourstore.com, a different host than the page. That's allowed, and normal for stores.
That's the whole modern spec. Two tags: <image:image> and <image:loc>. Google's documentation lists no others as functional today.
The deprecated tags you can skip
If you follow an older tutorial, you'll see tags like <image:caption> and <image:title>. Skip them. Google announced on August 6, 2022 that it no longer supports <image:caption>, <image:title>, <image:geo_location>, or <image:license> in image sitemaps (Google Search Central blog).
Leaving them in an existing file does no damage — Google just reads past them. But writing new ones is wasted effort. Your image's descriptive information now comes from the page itself: the alt text, the surrounding text, and the filename. The sitemap's only job today is discovery.
Platform-by-Platform: How to Actually Get One
How you produce the sitemap depends entirely on your platform. Here's the short version before the detail.
| Platform | Image sitemap support | What you do |
|----------|----------------------|-------------|
| Shopify | Automatic, featured image only | Nothing for the main image; use an app for gallery images |
| WooCommerce | Via Yoast or Rank Math | Install the plugin; images are included by default |
| Next.js / custom | Manual, full control | Add an images array in sitemap.ts |
| Static site | Manual | Generate image tags in your build step |
Shopify
Shopify generates sitemap.xml automatically and already includes each product's featured image inside an <image:image> tag (Shopify Help Center). For the primary image, you don't need to do anything.
The catch is that word featured. Shopify lists only the one primary image per product. Your gallery shots, alternate angles, and variant photos aren't in the native sitemap. If those additional images matter for search — and for most stores they do — you'll need a dedicated image sitemap from a Shopify app, submitted separately in Search Console.
You can't edit Shopify's native sitemap directly, so this is an add-on decision, not a code change. Weigh it against how much of your Google Images opportunity sits in those secondary photos.
WooCommerce
WooCommerce handles images through your SEO plugin. Both Yoast and Rank Math add <image:image> tags to their XML sitemaps for images found in your product content, and both do it by default (Yoast).
Rank Math tends to be the simpler path here. It includes images in the relevant sitemaps out of the box, with an image-SEO module you can toggle. Yoast also includes images, but has a known limitation: it doesn't automatically pick up images added through custom fields (ACF), which some product themes rely on for galleries.
Whichever you use, the practical step is the same. Install and activate the plugin, then check the product sitemap it generates. Confirm your product images actually appear inside <image:image> tags. If a gallery image is missing, that's usually the custom-field gap, and it's worth knowing before you assume the plugin has it covered.
Custom sites (Next.js, static generators)
On a custom stack you have full control, which means full responsibility. If you're on Next.js with the App Router, sitemap.ts supports images natively. Add an images array to each entry and Next.js writes the <image:image> tags for you (Next.js docs):
import type { MetadataRoute } from "next"

export default function sitemap(): MetadataRoute.Sitemap {
  return [
    {
      url: "https://yourstore.com/products/hammered-silver-ring",
      lastModified: new Date(),
      images: [
        "https://cdn.yourstore.com/rings/hammered-silver-ring-front.jpg",
        "https://cdn.yourstore.com/rings/hammered-silver-ring-side.jpg",
      ],
    },
  ]
}
Map that over your product data and you have a complete image sitemap generated at build time. Other static generators (Hugo, Astro, Eleventy) follow the same pattern. Loop your products in the sitemap template and emit one <image:image> block per image. Just remember to declare the namespace on <urlset>.
How to Submit and Verify in Search Console
Submitting is the easy part. Verifying that it worked is where the real signal lives, and most guides stop before it.
To submit: open Google Search Console, go to Indexing → Sitemaps, enter your sitemap URL (for example https://yourstore.com/sitemap.xml), and click Submit. If your image tags live inside your main sitemap, you're done — they went in with it. You don't submit images separately unless you built a standalone image sitemap file.
To verify — and this takes days, not minutes — check two things:
- The Sitemaps report should show the sitemap as Success with a discovered URL count that matches your pages. An error or a count of zero means the file itself has a problem.
- Image indexing is confirmed through the actual result. Search
site:yourstore.comin Google Images, or inspect a specific product URL with the URL Inspection tool and check whether the images are listed as crawled.
Give it a week or two before drawing conclusions. Indexing is not instant, and a freshly submitted sitemap won't move Google Images overnight. If images still aren't appearing after that, the problem is almost never the sitemap submission itself — it's one of the mistakes below.
Common Mistakes That Kill Image Indexing
When an image sitemap doesn't work, it's usually one of these four issues. They're ordered by how often they're the real culprit for stores.
1. CDN images on a different domain, without verifying the CDN. This is the big one. Yes, <image:loc> can point to a CDN domain — but Google adds a condition. You must verify both the main site and the CDN host in Search Console. Google's documentation is explicit: "the image URL may not be on the same domain as your main site. This is fine, as long as you verify both domains in Search Console" (Google Search Central). Skip that verification and Google may quietly ignore every cross-domain image.
2. Images blocked by robots.txt. A sitemap invites Google to the image; robots.txt can slam the door. If your robots.txt disallows the CDN path or the image directory, the sitemap listing does nothing — Google won't fetch a URL it's told not to. Check that the paths holding your product images are not disallowed, including on the CDN host.
3. Images missing from the rendered HTML. The sitemap helps discovery, but Google still prefers images it can also find on the page. If an image exists only in the sitemap and never in the rendered HTML — not even in a <img> or <link> — indexing is weaker and less reliable. The sitemap is a supplement to a crawlable page, not a replacement for one.
4. Non-canonical or redirecting URLs. Point <image:loc> at the final, live image URL. If it redirects, 404s, or points to a staging path, you're spending crawl budget on a dead end. The same goes for the page <loc>: it should be the canonical product URL, not a filtered or session-parameter variant.
Get past these four and a correctly built sitemap does its job. For the specifics of optimizing the product photos themselves once they're being indexed, see our guide on ranking product photos in Google Images.
Your Image Sitemap Checklist
Before you call it done, run through this:
- [ ] The
xmlns:imagenamespace is declared on<urlset> - [ ] Every product image you care about has its own
<image:image>block - [ ]
<image:loc>points to the final, live, canonical image URL (no redirects) - [ ] No deprecated tags (
image:caption,image:title) — they're just noise now - [ ] If images sit on a CDN, both domains are verified in Search Console
- [ ]
robots.txtdoes not block the image or CDN paths - [ ] The sitemap is submitted under Indexing → Sitemaps and shows Success
- [ ] You've checked image indexing with
site:search or URL Inspection after a week - [ ] Each sitemap file stays under 50,000 URLs and 50MB (split with a sitemap index if larger)
An image sitemap fixes discovery, not quality. It gets Google to see your product images. Whether those images then rank depends on the alt text, filenames, and metadata attached to them — the work that's wasted when the images were never found in the first place.
That's the part ImgSEO automates. It generates keyword-rich alt text, clean filenames, and embedded SEO metadata for your product images in batches, so that once your sitemap gets them discovered, they arrive with everything Google needs to rank them. You can try it free on 30 images, no credit card required.
Fix discovery with the sitemap. Fix quality with the metadata. Do both, and the product photos you've been staring at in your own store finally start showing up in everyone else's search results.